
Blogs
●
14.05.2025
It’s a fast-paced world out there, and as a professional you’ve got to be on your A-game all the time.
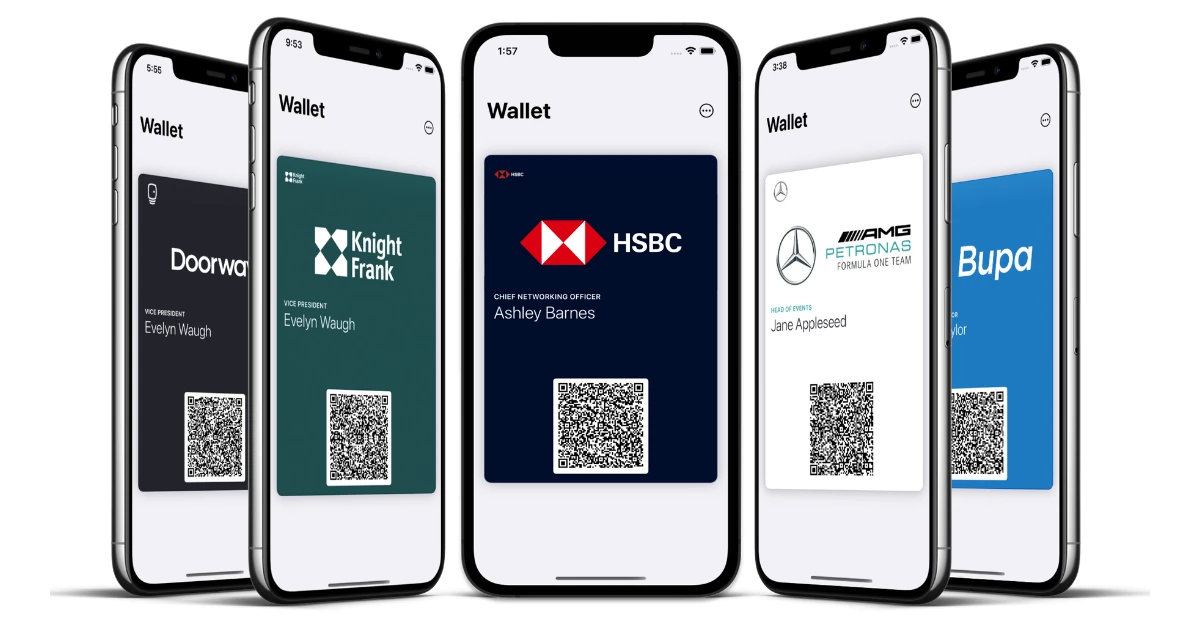

It’s a fast-paced world out there, and as a professional you’ve got to be on your A-game all the time. Using digital business cards and business card scanners can save you so much time and energy, streamlining your professional life by making networking more efficient. In this guide, we are going to explore how best to do this by step-by-step showing you how to create a digital business card on your Android phone and how to scan a paper one into your Google Contacts.
Simplify Contact Management with Scanned Business Cards
Scanning business cards into Google Contacts is a simple and efficient way to keep all your business contacts in one place. Instead of manually typing in contact information, you can quickly scan the business card and let Google Lens recognize the information for you. This method not only saves time but also ensures that the contact information is accurate and complete. By having your contacts digitized, you can easily search for specific contacts, organize them, and access them from anywhere using your Android phone.
The Challenges of Managing Business Cards
Before diving into the step-by-step guide, let’s explore the challenges of using traditional paper business cards.
Lost or Misplaced Cards
Paper business cards are prone to being lost or misplaced. This can result in the loss of business card data, valuable contacts or personal info, and missed opportunities for collaboration or networking.
Disorganized Contact Information
With a stack of business cards, it’s easy to lose track of a person and contact details. Contact details can be wrongly input, email addresses swapped and last names misspelled.
Difficulty in Searching for Specific Contacts
Manually searching through a stack of business cards and contact database can be time-consuming and inefficient. This challenge becomes even more pronounced as your company and the number of contacts grows, slowing down your workflow and project progress.
Scanning Business Cards into Google Contacts
Step-by-Step Guide to Scanning Business Cards with Google Lens
You don’t need a business card scanner app, you already have the best business card scanner in your pocket (and for free too!) even if you don’t know it! We’re going to walk you through a quick step-by-step guide on how to scan paper business cards to seamlessly sync their business card info into your google contacts.
Step 1Go to your Android’s camera app, there you’ll be able to see the Google Lens icon at the bottom of the photo’s frame. As shown in the screenshot below.Step 2Next, click on that icon and hold the paper business card in front of the camera steadily.
Step 3Wait for the camera to pick up the details, then click the little contact icon.Step 4Voilà! You can now successfully integrate business cards into google contacts!
How to Scan Business Cards into Google Contacts on an Android Phone
Step 1
Open the Google Contacts app on your Android phone.
Step 2
Tap on the Add Contact icon.
Step 3
Tap on Scan QR code.
Step 4
Hold your phone steady and align the business card within the picture frame.
Step 5
Wait for Google Lens to recognize all the information on the card.
Step 6
Review the information and make any necessary changes.
Step 7
Tap on Save to add the contact to Google Contacts.
Ensuring Accurate and Complete Contact Information
While GoogleLens is mostly accurate, there may be instances where the scanned contact information requires adjustment. After scanning the photo, just take a moment to review the information and make any necessary changes. This step ensures that the contact details are correct and complete, saving you from future annoyance!
Saving Contact Information to Google Contacts and Organizing with Labels or Groups
After scanning and reviewing the contact information, tap on Save to add the new contact to Google Contacts. To keep your contacts organized, you can use labels or groups in specific categories such as clients, colleagues, or suppliers. By assigning labels to your contacts, you can easily filter and search for contacts based on their category. Making everything simple, easy and efficient!
Maintaining and Organizing Contact Information in Google Contacts
To ensure that your contact and address information remains up to date and organized, follow these best practices:
Regular Updates and Backups
Periodically review your phone’s contacts, and update any changes, such as new phone numbers or email addresses. Additionally, please make sure to backup your Google Contacts to avoid data loss in case of device malfunction or accidental deletion. Nightmare!
Using Google Contacts’ Features to Avoid Duplicate Contacts and Streamline Collaboration
Google Contacts offers features to merge duplicate contacts automatically. Regularly utilize this feature to keep your contact list clean and avoid confusion. Furthermore, consider utilizing collaboration features such as sharing contact groups with team members to streamline communication within the organization.
Where Else Can I Apply This Learning: Streamlining Your Workflow with Scanning and Organization
The principles and techniques discussed in this guide can be applied beyond scanning and organizing business cards. Here are a few other areas where you can leverage similar practices to streamline your work life.
Scanning and Organizing Other Types of Documents, such as Receipts
Just like business cards, you can use scanning apps or features on your Android phone to digitize and organize receipts, ID cards, bills or any other valuable document. This way, you can easily either track expenses, categorize them, and simplify your financial record-keeping or ensure all of your personal information is organised and secure!
Applying Similar Principles to Other Contact Management Systems or Productivity Tools, such as Microsoft Outlook or Trello
While this guide focuses on using Google Contacts, the underlying principles of scanning and organizing contacts can be applied to other contact management software, systems or productivity tools. Explore the features and capabilities of the tools you use and see how you can streamline your contact management process within those platforms.
Conclusion: Streamlining Your Contact Management with Scanned Business Cards
All in all, it’s time to say goodbye to the hassle of traditional business cards and embrace the convenience of digital contact management. Give scanning business cards into Google Contacts a try, and experience the benefits firsthand. Empower yourself with technology; save business cards, simplify your contact management process, and take control of your professional network!
3 Questions People Might Have:
What if the contact information is not accurate after scanning?
If you notice any inaccuracies in the scanned contact information, you can review and make changes before saving the contact. Google Lens is quite reliable in recognizing details, but it’s always good to double-check for any errors.Can I use other apps to scan business cards into Google Contacts?
While Google Lens is the recommended method for scanning business cards into Google Contacts, there are other scanning apps available on the Play Store that can accomplish the same task. However, using Google Lens within the Google Contacts app provides a seamless integration and makes a smoother experience.How can I ensure that my contact information is secure and protected in Google Contacts?
Google takes data security seriously, and your contact information in Google Contacts is protected by them. However it’s always a good idea to enhance security by having a strong password for your Google account and enabling two-factor authentication.
Now that you’re a pro at digital networking, you might also be interested in exploring related topics such as using productivity tools for time management or organization. You can find more articles and resources on these topics below on our website to further enhance your workflow and create your best work/life balance!
Next Article
Share Article
